Last Updated: August 22, 2026
- Watch: How to Master Left-Handed Calligraphy — Video Review
- Understand Your Left-Handed Writing Style First
- Choose Nibs Made for Pushing, Not Pulling
- Rotate Your Paper Instead of Your Wrist
- Fast-Dry Ink and Paper Choices That Prevent Smudging
- Build Skills with Left-Handed-Specific Workbooks
- Tips
- Frequently Asked Questions
- Conclusion
- Related Articles
Calligraphy was designed by right-handed scribes for right-handed hands, which is exactly why so many lefties give up on it after a few smudged pages. The good news is that the pushing motion, ink pooling, and awkward wrist angles that trip up left-handed writers all have specific, fixable causes. Once you understand your pen angle, paper position, and nib choice, calligraphy becomes just as achievable for you as anyone else.
This guide walks through the real mechanics of left-handed calligraphy in 2026, from underwriter and overwriter grips to the tools that actually reduce smearing, plus a few workbooks built specifically for left-handed practice instead of mirrored right-handed instructions.
As an Amazon Associate we earn from qualifying purchases at no extra cost to you. Product prices and availability are accurate as of the date shown and are subject to change.




⚡ Save on Your Next PC — Amazon Prime
Prime members get fast free shipping on the systems above, plus early access to Prime Day & Black Friday PC deals. New members get a 30-day free trial.
Watch: How to Master Left-Handed Calligraphy — Video Review
Understand Your Left-Handed Writing Style First
Before buying anything, figure out which of the three common left-handed grips you use. Your grip determines your pen angle, and pen angle determines whether you’ll smudge, skip, or write cleanly.
- Underwriter (hook grip): hand curls below the baseline. Works well with most oblique and italic nibs since the wrist stays fairly natural.
- Overwriter: hand stays above the baseline, wrist bent. Best paired with a steeper, more upright nib angle around 30-40 degrees.
- Sidewriter: hand approaches from the side. Needs the most paper rotation, often 60-90 degrees clockwise.
Watch your own hand in a mirror for two minutes while writing a full alphabet. Most left-handers default to underwriting without realizing it.
Choose Nibs Made for Pushing, Not Pulling
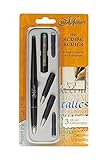
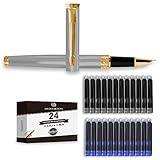
Right-handed nibs are cut to be pulled across the page; left-handers often push, which catches paper fibers and causes ink spatter. A set like the MANUSCRIPT Left Handed Nib Scribe Calligraphy Pen and Nib Set (7-piece) includes nibs specifically ground for a left-handed pushing stroke, so the tines don’t dig in at oblique angles.
- Look for “left oblique” or “left-handed cut” in the product description, not just “calligraphy nib.”
- Start with a broad-edge nib (around 2.5-3.5mm) before moving to fine 1mm nibs, since wider nibs forgive angle inconsistency.
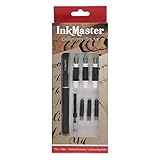
- Fountain pen sets with interchangeable nibs, such as the Ink Master Calligraphy Set with 4 nib sizes and 20 ink cartridges, let you test multiple widths without buying separate pens.
Rotate Your Paper Instead of Your Wrist
The single biggest fix for left-handed smearing is paper rotation, not hand contortion. Most left-handers write cleanest with paper turned 30-45 degrees clockwise from square.
- Tape a protractor printout to your desk once to find your exact comfortable angle, then mark it with tape.
- Keep your wrist straight and pivot from the shoulder for long strokes; a bent wrist is the top cause of hand-crossing-the-line smudges.
- Use a slant board (roughly 20 degrees) if you write for more than 15 minutes at a time, since it reduces the wrist flexion overwriters and sidewriters need.
Fast-Dry Ink and Paper Choices That Prevent Smudging
Because left-handed hands often drag across freshly written lines, ink dry time matters more to you than to right-handed writers.
- Choose inks labeled “quick-dry” or “fast-drying,” typically drying in 3-5 seconds versus 15-20 for standard calligraphy ink.
- Smooth, coated paper (90gsm or higher) resists feathering better than standard printer paper.
- Blot with a soft cloth rather than wiping, since wiping smears wet ink sideways across the page.
Build Skills with Left-Handed-Specific Workbooks
Generic calligraphy books demonstrate strokes for a right-handed pull motion, which forces lefties to mentally reverse every instruction. Workbooks built for left-handed writers remove that translation step entirely.
- A Left-Handed Cursive Handwriting Workbook for Teens walks through guided tracing and daily drills sized for teen hand development, ages 13-18.
- For adults refining italic form, Italic Letters: Calligraphy & Handwriting covers letter construction principles that apply regardless of hand dominance, useful once your grip fundamentals are solid.
- Rotate between two workbooks (one drill-based, one form-based) to avoid plateauing on a single skill.
Tips
- Practice for 10-15 minutes daily rather than one long weekly session; muscle memory for pen angle builds faster with frequency.
- Keep a scrap sheet under your writing hand to catch natural oils and prevent paper drag.
- Photograph your work weekly and compare letter slant over a month to track real progress, not just how it feels.
- Replace nibs every 20-30 hours of practice; a worn tine catches paper regardless of technique.
Frequently Asked Questions
Do I really need a left-handed nib, or can I just adjust my angle?
You can compensate with angle and paper rotation alone, but a left-oblique nib cuts practice time significantly because it removes the fight against the tool itself. Most left-handers see cleaner lines within their first week using a proper left-handed nib.
Why does my ink smear even after it looks dry?
Ink can look set on the surface while remaining wet underneath, especially with thicker calligraphy inks. Wait a full 60 seconds on new ink types before resting your hand nearby, and consider a fast-dry formula if this happens consistently.
Should teens use the same workbook as adults?
Not necessarily. Workbooks labeled for teens (13-18) use age-appropriate letter sizing and drill pacing, while adult-focused books like italic-specific guides assume finer motor control already exists. Start teens on the age-matched workbook first.
How long until left-handed calligraphy feels natural?
With daily 10-15 minute practice, most left-handers report comfortable, smudge-free basic strokes within 3-4 weeks and confident full-word writing by 8-10 weeks. Consistency matters more than session length.
Conclusion
Left-handed calligraphy isn’t a lesser version of the right-handed craft, it’s a distinct technique with its own tools, angles, and paper habits. Start with a left-oriented nib set, rotate your paper to your natural angle, and work through a left-handed-specific workbook rather than a generic one. Those three changes alone solve the majority of smudging and fatigue issues lefties run into, leaving you free to focus on actual letterforms.
Related Reviews & Guides
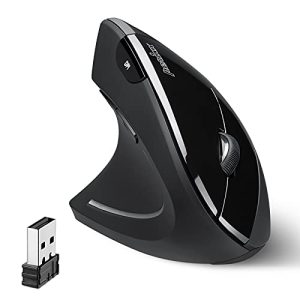
6 Best Ergonomic Left-Handed Computer Mices for 2026

Review: Top Left-Handed Scissors for Everyday Use