Last Updated: October 11, 2026
- Best Digital Sound Level Meters for Noise Monitoring
- Choose by the job, not by the largest decibel number
- What the decibel readings actually tell you
- Accuracy classes: when Class 2 is enough
- Buying recommendations by use
- Data logging: useful only when the record is usable
- Calibration and care are part of the purchase
- A practical setup for a repeatable reading
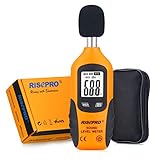
- Top Pick: Decibel Meter, TopTes TS-501B Sound Level Meter with 2.25” Backlit LCD Screen, Portable SPL Tester with A/C Weighted, Range 30-130dB, MAX/MIN, Data Hold, Use for Home, Noisy Neighbor, Factory – Orange
- Best Value: CRY2831 IEC 61672-1:2013 Sound Level Meter Class 2, Factory Calibrated
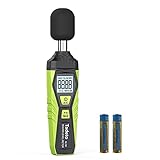
- Premium Choice: Decibel Meter, Tadeto Digital Sound Level Meter Portable SPL Meter 30dB to 130dB MAX Data Hold with LCD Display Backlight A/C Weighted for Home Factories
Best Digital Sound Level Meters for Noise Monitoring
The best digital sound level meter for noise monitoring is a Class 2 meter with A-weighting, selectable Slow and Fast response, a stated measurement range that fits your environment, and data logging if you need to track noise over time. For occasional home checks, a basic meter may be enough; for workplace assessments or defensible records, choose a model with documented accuracy, calibration support, and a clear logging workflow.
Choose by the job, not by the largest decibel number
A meter’s maximum range is only useful if the instrument can measure accurately across the levels you expect. First decide whether you need a quick reading, a record of changing noise, or measurements for a formal assessment. Smartphone apps can help identify loud areas, but a dedicated meter is the better choice when consistent readings, a specified accuracy class, or calibration are important.
As an Amazon Associate we earn from qualifying purchases at no extra cost to you.


| Situation | Practical choice | Useful features | Typical budget range |
|---|---|---|---|
| Occasional home checks | Entry-level digital sound meter | A-weighting, Slow response, stated accuracy, maximum-hold display | About $20–$60 |
| Frequent home or hobby monitoring | Better-specified handheld meter | Class 2 specification, calibration adjustment, tripod mount, data output | About $60–$200 |
| Ongoing workplace screening | Logging Class 2 meter | Time history, LAeq, configurable intervals, exportable files, calibrator compatibility | About $200–$700 |
| Formal occupational or environmental work | Professional meter selected to the applicable standard | Class 1 or Class 2 as required, traceable calibration, suitable microphone and accessories | Often $700 and up |
These are broad market ranges, not quotes. Prices vary with included accessories, logging software, calibration documentation, and regional requirements.
What the decibel readings actually tell you
Decibels use a logarithmic scale, so a change of 10 dB represents a tenfold change in sound intensity—not a small linear step. A reading of 80 dB is not “twice as loud” as 40 dB, and perceived loudness depends on the sound and listening conditions.
- dBA (A-weighting): Reduces the influence of low and very high frequencies to approximate human hearing. It is widely used for general environmental and workplace noise screening.
- dBC (C-weighting): Includes more low-frequency sound. It can help when bass-heavy noise or peaks matter, but use the weighting required by your measurement task.
- Fast and Slow response: These settings control how quickly the display follows changes. Fast is useful for fluctuating sound; Slow steadies the display for relatively consistent noise. They are time responses, not accuracy grades.
- LAeq: An energy-averaged A-weighted level over a stated period. It is more useful than a single snapshot when noise rises and falls.
- Peak and maximum: Peak captures very brief high-pressure events; maximum usually records the highest displayed level under the selected response setting. Check the manual—these are not interchangeable.
As a rough orientation, a quiet room may be around 30–40 dBA, normal conversation often falls near 55–65 dBA, and busy road traffic can be around 70–85 dBA at a particular location. These are illustrative ranges, not safety limits: distance, barriers, duration, and measurement method all change the result.
Accuracy classes: when Class 2 is enough
IEC 61672 defines sound level meter performance classes. Class 1 has tighter tolerances than Class 2 across relevant conditions; neither class guarantees that every reading is exact. The microphone, frequency response, temperature, wind, positioning, and calibration all affect the result.
For household comparisons—such as checking whether a fan is louder in one room than another—a well-specified Class 2 meter is usually a sensible starting point. For compliance, investigations, or work that must meet a particular rule, verify the required class and measurement procedure with the relevant authority or a qualified acoustics professional. A low-cost meter that merely displays “±1.5 dB” is not automatically equivalent to a standards-rated instrument.
Buying recommendations by use
For home, renovation, and neighbor-noise notes
Choose a simple meter with A-weighting, Slow and Fast response, a useful range beginning below typical indoor levels, and maximum hold. A tripod socket is valuable: holding the meter by hand can change its position and introduce handling noise. If the purpose is to compare events over several days, prioritize logging over extra display modes.
For workplace screening and recurring checks
Look for a Class 2 specification, LAeq measurement, time-history logging, exportable data, and a stated logging interval. Confirm whether the software exports ordinary CSV files or locks records into proprietary software. If you need personal exposure over a shift, a sound level meter may not be the right instrument; a noise dosimeter and the applicable workplace method may be required.
For outdoor monitoring
Prioritize a compatible windscreen, stable tripod mounting, weather protection, and reliable long-duration logging. A windscreen reduces wind-related microphone noise but does not make a meter waterproof. Keep the microphone away from walls and large reflective surfaces when practical, and record wind, rain, traffic, and other conditions that could explain unusual readings.
Data logging: useful only when the record is usable
Logging turns scattered readings into a time series, which can reveal whether a problem is constant, intermittent, or tied to a schedule. Before buying, check the maximum recording duration at your chosen interval, memory capacity, battery life while logging, clock-setting method, and how files are retrieved. A meter that logs only one-second values may fill its memory quickly; one that stores only summary values may hide brief events.
For a room monitored for eight hours at a one-minute interval, the meter needs at least 480 time-stamped records, plus any summaries or event data. Set the interval to match the question: shorter intervals help locate brief events, while longer intervals conserve memory for broad trends. Keep the original file and note the meter’s settings, location, start and end times, and unusual events.
Calibration and care are part of the purchase
A sound calibrator produces a known reference tone, commonly 94 dB at 1 kHz. A compatible calibrator lets you check the meter before and after a measurement session; it does not replace periodic calibration by a qualified laboratory when that is required. Check that the calibrator fits the microphone and supports the meter’s configuration before buying either item.
- Use a fresh battery or verify charge before a long logging session; low power can interrupt records.
- Keep the microphone clean and dry. Do not touch the diaphragm, and follow the manufacturer’s instructions for storage and cleaning.
- Use a windscreen outdoors and avoid measuring in rain unless the equipment is rated for those conditions.
- Record calibration checks and any drops, repairs, or microphone changes. A damaged or replaced microphone can invalidate old assumptions about accuracy.
- Do not cover the microphone with a hand or place it directly against a surface unless the measurement method calls for contact measurement.
Microphones and windscreens are the parts most exposed to wear, dust, moisture, and accidental knocks. A protective case and replaceable windscreen can matter more over time than a long list of rarely used display functions.
A practical setup for a repeatable reading
- Define the question. Decide whether you need a spot level, an average over time, a maximum, or a formal assessment.
- Check the instrument. Confirm battery, weighting, response, range, and calibration status. If using a calibrator, follow both manuals and record the check.
- Position consistently. Use the same height and distance when comparing locations. Keep your body away from the microphone and avoid nearby reflective surfaces where possible.
- Measure long enough. A momentary reading may miss intermittent noise. Use LAeq or logging for changing conditions and write down the measurement duration.
- Document context. Save settings and note doors, windows, machinery, weather, and other conditions that could affect the result.
For a quick household comparison, a reputable Class 2 handheld meter with A-weighting and a tripod mount is usually the best balance. Add logging for changing or recurring noise; step up to a standards-compliant, calibrated system when the results will support workplace decisions, regulatory work, or a formal dispute.
Related Reviews & Guides


6 Best Women’S Left Handed Golf Clubs Sets 2026

6 Best Left-Handed Scissors For Sewing 2026