Last Updated: October 22, 2026
- Start with readiness, not drills
- Let the child choose, and support that choice
- Grip: what to aim for
- Paper angle and body position
- Tools that make life easier
- A ten-minute practice routine
- Teaching tips for the classroom and home
- Handling smearing and frustration
- When to ask a teacher or therapist for help
- Related guides
- Frequently asked questions
Support the hand your child naturally chooses, and set up three things: a relaxed pencil grip held a little back from the tip, paper tilted clockwise and placed toward the left side of the body, and tools that suit the left hand. Pressure to switch hands is widely discouraged. This guide covers readiness, grip, paper position, helpful tools, a short practice routine with stated assumptions, classroom tips and signs it may be time to ask a teacher or therapist for help.
Start with readiness, not drills
Writing grows out of earlier skills. Before a child can form letters, they usually spend a long time scribbling, drawing, stacking, squeezing and pinching. These activities build the small hand muscles and the coordination that make a pencil controllable later. Many children show a clear hand preference during the preschool years, but the timing varies, and there is no need to rush the decision.
Activities that build readiness include play dough, tearing paper, threading beads, finger painting, using tongs, and drawing on a vertical surface such as an easel or a wall-mounted board. Vertical work also strengthens the shoulder and wrist, and it gives left-handed children a clear view of what they are drawing.
Let the child choose, and support that choice
Handedness is a natural preference. Trying to push a child toward the right hand is widely discouraged because it can make writing more tiring and discourage a child who is just learning. Instead, let your child reach for the pencil with whichever hand they prefer, and make sure the environment is set up so that the hand works well.
If a child seems to switch back and forth for a long time, mention it to the teacher or a pediatric occupational therapist, who can look at the whole picture. Switching in early childhood is common and not automatically a problem.
Grip: what to aim for
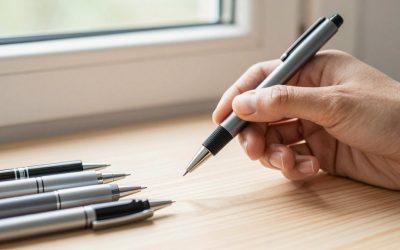
A common target is the tripod grip, in which the pencil rests against the side of the middle finger, and the thumb and index finger pinch it near the tip. Fingers are relaxed and slightly curved, and the pencil rests in the web between the thumb and index finger.
Left-handed children benefit from holding the pencil a little higher, perhaps an inch or so from the tip, since this keeps the writing visible. A grip held too close to the tip often encourages a hooked wrist and a view that is blocked by the hand.
- Show the grip by modeling it with your own hand, then let the child try.
- Use a short pencil or a broken crayon, which encourages a pinch.
- Try a triangular pencil or a soft grip if the child’s fingers tire quickly.
- Avoid correcting every grip detail; comfort and control matter most.
Paper angle and body position
For many left-handed children, the best position tilts the paper clockwise so the top edge leans to the right. The paper sits slightly to the left of the child’s midline, in line with the writing arm. The writing hand then stays below the line of text, instead of crossing over it.
Seating matters too. Feet should be flat on the floor or a footrest, the chair should allow the elbow to rest comfortably near table height, and the non-writing hand should hold the paper steady. If a child has to curl around the page, the setup needs adjustment. A desk that is too high forces the shoulder up, and one that is too low causes slouching.
Keep in mind that tilt is individual. Let the child try two or three angles, and keep the one that gives readable letters without strain.
Tools that make life easier
A few tool choices can lessen the frustration that left-handed children sometimes feel.
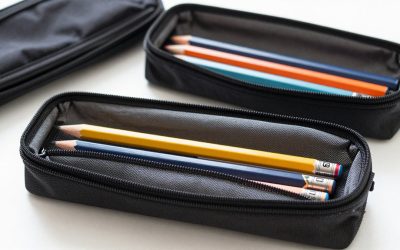
- Pencils and markers: choose dark, easy-flowing pencils so the child does not press hard. Washable markers and quick-drying inks smear less when the hand follows the line.
- Grips: soft or triangular grips can encourage the right finger placement.
- Notebooks: top-bound pads or notebooks with the binding on the right avoid a spiral digging into the hand.
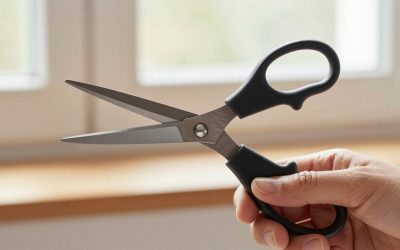
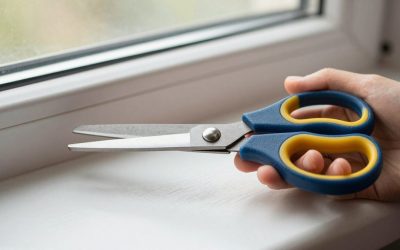
- Scissors: left-handed scissors let the child see the cutting line. Choose blunt-tipped child-safe scissors and supervise young children. Our comparison of ceramic and stainless left-handed scissors looks at blade material differences, which become more relevant as children get older.
- Rulers: rulers with numbers running right to left help left-handed children measure from the right edge.
A ten-minute practice routine
This sample routine assumes a four- to six-year-old with a short attention span. Adjust it freely, and stop when the child tires.
- Warm up (2 minutes): squeeze play dough, open and close the fingers, shake out the hands.
- Set up (1 minute): tilt the paper, check the seat, and place the pencil in the grip.
- Pre-writing strokes (3 minutes): draw lines, circles and zigzags, moving left to right.
- Letters (3 minutes): practice two or three letters, starting at the top, and praise effort over neatness.
- Finish (1 minute): admire the work and shake out the hand.
Short and frequent sessions are better than one long one. Three or four brief sessions a week are plenty for most young children.
Teaching tips for the classroom and home
Let the teacher know your child is left-handed so they can seat the child on the left side of a right-handed neighbor, which avoids bumping elbows. Ask whether left-handed scissors are available, and whether the child can tilt paper at the desk. Demonstrations are tricky for a left-handed child, because most teachers model with the right hand. Showing the child a mirror image, or sitting opposite and mirroring, can clear things up.
At home, keep left-handed tools in a visible place and keep the mood light. A child who associates writing with frustration may resist it, while a child who feels successful keeps practicing.
Handling smearing and frustration
Young left-handed writers often smear pencil and ink because the hand follows the writing. Sharpened pencils with firm leads smear less than very soft ones, and a clean slip sheet under the hand helps. Praise effort and keep early practice on paper that is not graded, so the child sees mistakes as part of learning. If frustration builds, stop and try again another day, since a calm session teaches more than a long, tense one.
When to ask a teacher or therapist for help
Many children go through awkward phases. Ask the teacher or a pediatric occupational therapist if your child complains of pain, avoids drawing and writing entirely, tires very quickly, or struggles well beyond what classmates experience. A professional can assess grip, posture and hand strength, and offer tailored activities. This guide offers general information, not a diagnosis or treatment.
Related guides
- Pens For Left Handed Writers That Dry Fast And Dont Smudge
- How To Stop Smudging When Writing Left Handed
Frequently asked questions
At what age should parents start teaching a child to write?
There is no single age. Many children begin scribbling and drawing in the toddler years and show a hand preference during the preschool years, but timing varies a great deal. Start with play that builds hand strength, such as drawing, play dough and tearing paper, and let formal letter practice follow when the child shows interest. If you are unsure whether your child is ready, a teacher can offer guidance.
Should a left-handed child be pushed to use the right hand?
No. Handedness is a natural preference, and pushing a child to switch is widely discouraged because it can make writing harder and more frustrating. Support the hand they naturally choose, offer comfortable tools and a good setup, and keep practice relaxed. If you have concerns about hand preference or coordination, discuss them with the child’s teacher or pediatric occupational therapist.
What is the best pencil grip for a left-handed child?
The tripod grip, where the pencil rests between the thumb and index finger and is supported by the middle finger, is a common goal. Left-handed children often benefit from holding the pencil a bit farther from the tip so they can see their work. Grips and triangular pencils can help, but comfort and control matter most. If a child’s grip looks painful or tiring, ask the teacher about alternatives.
How should the paper be placed for a left-handed child?
Many left-handed children do well with the paper tilted clockwise, and placed slightly to the left side of the body. This allows the hand to stay below the line being written and keeps the child’s view of the letters clear. Some children prefer a different angle. Let your child try a few, and keep the one that feels comfortable and produces readable letters.
Do left-handed children need special scissors?
Scissors designed for the left hand have blades arranged so the cutting line stays visible and the blades cut cleanly with a left-hand squeeze. Standard scissors used in the left hand can push the blades apart and hide the cutting line, which makes cutting frustrating. Look for child-safe, blunt-tipped scissors labeled for left-handed use, and supervise young children whenever scissors are in use.
Related Reviews & Guides




3 Best Left Handed Watches: Crowns on the Left Side

3 Best Left-Handed Tape Measures for Easy Reading