

Last Updated: September 18, 2026
Setting up a left-handed gaming mouse is more involved than plugging it in and moving it across the desk. A poor setup can reverse your primary and secondary clicks, leave thumb buttons out of reach, create wrist strain, or make your aim feel inconsistent from one game to the next. Wireless models can also introduce avoidable problems if they are not charged, paired, or positioned correctly.
The good news is that most of the work takes less than 20 minutes. The process below covers physical placement, operating-system settings, button mapping, DPI, polling rate, game controls, and comfort checks. Whether you use a dedicated MMO mouse such as the $149 Razer Naga Left-Handed or an $18.99 wireless vertical mouse from MEETION, the same basic principles apply.
As an Amazon Associate we earn from qualifying purchases at no extra cost to you. Product prices and availability are accurate as of the date shown and are subject to change.
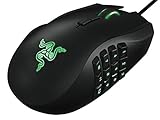

Quick answer: Our top pick in 2026 is the Left-handed gaming mouse — our #1 rated choice. See the full ranked comparison, alternatives and buying advice below.
What You Need
| Item | Why | Optional? |
|---|---|---|
| Left-handed gaming mouse | Provides a shell, sensor, and button layout designed for left-hand use. Check that its length and width fit your hand. | No |
| Mouse software | Lets you assign buttons, save profiles, adjust DPI, set lighting, and change polling rate when supported. | Usually recommended |
| USB cable or receiver | Charges a wireless mouse or connects a wired model. A receiver extension can improve wireless reliability. | No for the appropriate connection type |
| Flat, low-friction mouse pad | Creates predictable tracking and gives your forearm room to move without catching on the desk. | No for gaming |
| Measuring tape | Helps confirm that you have enough desk depth and width for a comfortable left-handed reach. | Yes |
| Game or application profile | Allows different button assignments for shooters, strategy games, MMOs, editing, or everyday work. | Yes |
Step-by-Step
1. Clear and measure your space — 2 minutes
Move the keyboard, monitor stand, and other objects away from the left side of the desk. Aim for at least 12 inches of usable width beside the keyboard and approximately 10 to 14 inches of front-to-back mouse-pad depth. More room is helpful if you use low sensitivity and make broad arm movements.
Keep the mouse at roughly the same height as your keyboard. Your left elbow should remain near your side rather than reaching forward or outward. If the desk edge presses into your forearm, move the pad farther onto the surface or add a desk mat with a soft edge.
2. Install or connect the mouse — 3 minutes
For a wired mouse, connect the cable directly to a USB port on the computer rather than a passive hub when possible. For a wireless model, charge it fully according to the manufacturer’s instructions, switch it on, and connect its USB receiver or Bluetooth pairing. A receiver placed within about 12 inches of the mouse generally has a better path than one hidden behind a computer tower.
Remove any shipping film from the sensor and glide feet. If the mouse has a detachable cable, push the connector in firmly but do not force it at an angle. Allow the operating system a moment to install its basic driver before opening optional configuration software.
3. Confirm left-handed primary buttons — 2 minutes
Open your computer’s mouse settings and select the option that makes the right-side button your primary click. On Windows, look for the primary mouse-button setting in Mouse settings. On macOS, open Mouse settings and select the appropriate primary-click choice. The exact menu names may vary with your operating-system version.
Test the change by selecting a desktop icon with your left index finger and opening a context menu with your left middle finger. If the buttons feel reversed, fix the system setting before changing individual game controls. Some gaming software also has a left-handed layout option; use it only after the operating-system buttons work correctly.
4. Install the manufacturer’s software — 3 minutes
Use the mouse maker’s current configuration application if you want advanced controls. Create a basic profile first, then check for a firmware update. Keep the mouse connected by cable during an update, and do not unplug it until the software confirms completion.
Look for settings labeled DPI or sensitivity, polling rate, button assignments, lift-off distance, angle snapping, debounce time, and onboard memory. Not every mouse offers all of these controls. Save a default profile before experimenting so you can return to a known setup.
5. Set a practical DPI and polling rate — 3 minutes
DPI controls how far the pointer moves for a given physical movement. Start at 800 to 1,200 DPI for general gaming and desktop use. If you prefer large arm movements, try 400 to 800 DPI; if you have limited desk space, 1,600 to 3,200 DPI may be more comfortable. There is no universal best value.
Set the polling rate to 1,000 Hz if the mouse and computer support it. Lower choices such as 500 Hz can reduce power use on some wireless mice. A higher setting is not automatically better if it makes battery life inconvenient or causes compatibility problems. Disable DPI buttons you frequently press by accident, or assign them to a safe secondary profile.
6. Map extra buttons sensibly — 4 minutes
Keep the primary left and right clicks, scroll wheel, and any essential side buttons easy to reach. For a mouse with many controls, assign only a few functions at first. Useful choices include push-to-talk, reload, melee, push-to-talk mute, copy, paste, or an MMO ability bar.
For example, the Razer Naga Left-Handed includes 12 programmable thumb buttons, making it suitable for games with numerous shortcuts. Arrange related commands in groups and use the software’s test panel to verify every button. Avoid assigning a dangerous command, such as deleting a file or closing an application, to a button you may press while repositioning your hand.
For a vertical mouse such as the wireless MEETION model, prioritize comfort over a crowded layout. Its upright grip may reduce the need to twist your forearm, but the shape can change how quickly you reach the scroll wheel or side controls.
7. Match the game’s controls — 3 minutes
Open the game’s key-binding menu and check whether it has independently remapped mouse buttons. Set the in-game primary action to your left click and secondary action to your right click. Then assign extra buttons one at a time and test them in a safe area or training mode.
Check both mouse sensitivity and any acceleration setting. If the cursor or crosshair feels inconsistent, turn off acceleration in the operating system or game where possible, then adjust sensitivity gradually. Change only one setting at a time and play for at least five minutes before deciding whether it helped.
8. Check posture and save the profile — 3 minutes
Rest your palm lightly on the shell, keep your wrist as straight as possible, and let your forearm move the mouse. Your fingers should reach the main buttons without stretching. If your fingertips hang far over the front or your palm cannot contact the rear of the shell, the mouse may be the wrong size.
Save the profile to the mouse’s onboard memory if available, then test it on another computer or in a second game. Write down your preferred DPI and sensitivity so you can restore them after a reset.
Mistakes to Avoid
- Using a right-handed mouse flipped around: The sensor may track normally, but the contours, thumb rest, and button positions can cause discomfort.
- Changing too many settings at once: You will not know whether DPI, acceleration, or button mapping caused the problem.
- Running the mouse at an extreme DPI: Very high sensitivity can make precise aiming difficult, while very low sensitivity may force repeated lifts.
- Ignoring cable and receiver placement: A taut cable can pull the mouse, and a receiver hidden behind metal or a desktop tower may reduce wireless reliability.
- Overloading every programmable button: Extra controls help only when you can identify and press them consistently.
- Using a dirty or damaged mouse pad: Dust and uneven surfaces can produce rough movement and inconsistent sensor tracking.
- Accepting pain as normal: Numbness, tingling, or sharp wrist pain is a signal to stop and change the setup.
How Often
Check the mouse setup every time you install a major game or change computers. Review DPI and button profiles monthly if you use the mouse heavily. Clean the shell and buttons weekly or every two weeks with a dry microfiber cloth, and inspect the sensor and feet at the same time. Keep liquids away from the mouse; never spray cleaner directly onto it.
Recharge a wireless model when its indicator reaches the low-battery warning rather than waiting for it to shut down during a game. Recheck posture whenever you move the keyboard, change chairs, or add a monitor.
When to Call a Pro or Replace
You generally do not need professional help for software mapping, but contact the manufacturer if firmware installation repeatedly fails, the mouse disconnects on multiple computers, or buttons register twice after cleaning and resetting. A repair shop may be worthwhile for a valuable model with a damaged cable, loose USB port, or failed scroll wheel, especially if it is still under warranty.
Replace the mouse when the sensor skips across clean surfaces, the battery no longer holds a practical charge, the shell develops a sharp crack, or repeated clicks occur after troubleshooting. Also replace it if its shape consistently causes pain. A cheaper, properly sized mouse is better than an expensive model that forces your wrist into an awkward position.
FAQ
How do I make a left-handed mouse primary in Windows?
Open Mouse settings, find the primary mouse-button option, and choose the right button. Test a normal click and a context-menu click before opening your game. If the game ignores the change, check its own control settings.
What DPI should I use on a left-handed gaming mouse?
Start between 800 and 1,200 DPI, then adjust based on desk space and aiming preference. DPI is not determined by handedness. A left-handed player should use the same general range as any other player, provided the setting feels controlled and comfortable.
Can I use a vertical mouse for gaming?
Yes, particularly for strategy, role-playing, casual, and office-oriented games. A vertical design can feel comfortable for long sessions, but it may be less suitable for fast competitive aiming if its sensor, shape, or button placement does not support quick movements.
Why does my left-handed mouse keep disconnecting?
Charge it, reconnect the receiver, try another USB port, and move the receiver closer to the mouse. Then check for firmware or driver updates. If the problem continues on more than one computer, the cable, receiver, battery, or internal electronics may need replacement.
Ready to decide? Our #1 pick for 2026 is the Left-handed gaming mouse.
Live price & availability on Amazon.
Related Reviews & Guides



Left Handed Pinking Shears Scissors Sewing Review

Quick Picks: Left-Handed Bevel Squares for Woodworking


